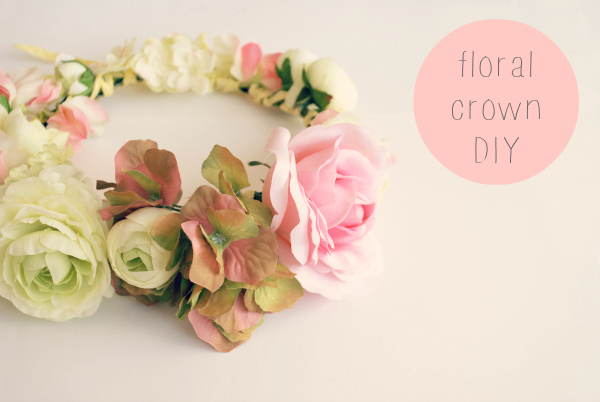
The secret to making the perfect floral crown.
When it comes to making the perfect floral crown, because lets face it, no princess should be without one, there are some surprisingly simple techniques involved. Often called the princess or fairy crown, floral crowns have a charmingly beautiful appearance that can be perfect for many different occasions including birthdays, weddings, and seasonal holidays such as Halloween or Christmas. The basic steps discussed herein can be applied to more than just the spring and fall crown examples. Using the template instructions and your imagination, you can apply it to just about any combination of leaves and foliage you can think of. Things you will need before beginnings: lightweight wire and wire cutter if applicable, floral tape, assorted flowers, and sharp floral scissors.
Step one, the foundation of the crown.
Unlike those childish crowns of dandelions and clovers, which many people may recall braiding and twisting together when they were young, this crown does not have a base made of stems. Using a semi stiff wire that is lightweight and durable is one of the biggest secrets to making a somewhat more durable floral crown. The exact type of wire that you use can depend on what is available. You can potentially recycle from something around the house, or ask your local craft shop for a recommendation. Often when you explain to them what you need it for, they can point you in the right direction. The colour of the wire doesn’t typically make a difference, as these style crowns are not designed to show off the wire works. Some people even use old clothes hangars, but those tend to have too much resistance and don’t make crowns that encircle the head.
Making the base of the crown.
Once you have your wire, wrap it around the top of your head to measure out what will be the base of your crown. Once you have measured out what will be a good fit for you, cut the wire from the spool, or however else it came. Be sure to give yourself about two extra inches of wire so you can secure it closed without making it too tight in the end.
One manner of closing the base of the crown:
Holding the loop of wire in your hands so that the ends are parallel to one another, press them together and bend them straight up, at a 90 degree angle, about one inch from the end. Now, twist the upright ends together, just as if your were closing up a loaf of bread with a twist tie. Once you reach the end again, fold the twisted ends back against one side of the loop, it doesn’t really matter which.
Securing the base of your crown and selecting your flowers.
Using the other secret to making a simple, yet awesome, floral crown, take the floral tape and wrap the entire base securely. Depending on the arrangement, you will want to use a different coloured floral tape to help blend in with the flowers. This will not only ensure the ends are keep in place but will provide a lovely sort of camouflage for the wire base and add a modest level of comfort to it as well. Once it is neatly wrapped, it is time to select and prepare the flowers.
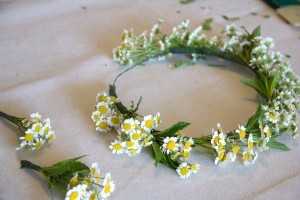
Suggested flowers for spring and summer time: Light and feathery flowers work best for this style of crown, selections such as sea lavender, golden rod, and goose-neck loose-strife is a popular combination in some areas. It has a delicate combination of green, yellow and bluish purple that make for an excellent light and summery crown. Sing green is the colour of spring, regular green or even light green floral tape works best for this crown.
Suggested flora for the fall: Fall is a time of darker, earthier colours. Rich golden oranges and deep burgundy shades are the coal for a fall themed crown. Red Mastumoto Asters, orange lilies, and yellow poms are a nice mix for capturing the signature cascade of colour that is synonymous with the changing of the leaves. It should be noted that in a fall crown you will want to use brown or golden coloured floral tape.
Once you’ve picked out your flowers, its time to begin.
Carefully trim up your flowers and arrange them into petite bouquets that consist of one of each type of flower that you chose. Bind them together with floral tape and line them up along the edge of the base, continue to do so until it appears you have enough to cover the entire loop.
Slowly and securely bind the bouquets to the base using floral tape. There should be a slight bit of overlap as you secure them. When you get to the last bouquet, you will have to be extra careful and patient when securing it. Once the last one is in place though, you are finished.
Tips and variations on the basic floral crown.
There are many people who love flowers, but dislike picking them and who prefer to use silks when needed for decoration. One of the wonderful things about the techniques discussed here is that you can use the came steps with silk flowers as well. You can even go a step further with silk flowers in order to make the crown a lot more durable. Instead of just binding silk flowers with floral tape, you can also use jewellery wire to further secure them to the base. It can be a bit tedious to wind the thin wire around and through the thick plastic foliage, but it can significantly increase the lifespan of the crown.
To help preserve crowns that use picked flowers there are not a lot of things you can do once the crown is make. However, there are tricks you can use to preserve the flowers before using them, but they can take a few weeks to prepare using these methods. It also involves a lot of chemicals, after which the flowers will have a slightly desiccated appearance. Which, for Fall and Halloween crowns may be something to consider, but it is not advisable for Spring crowns.

